
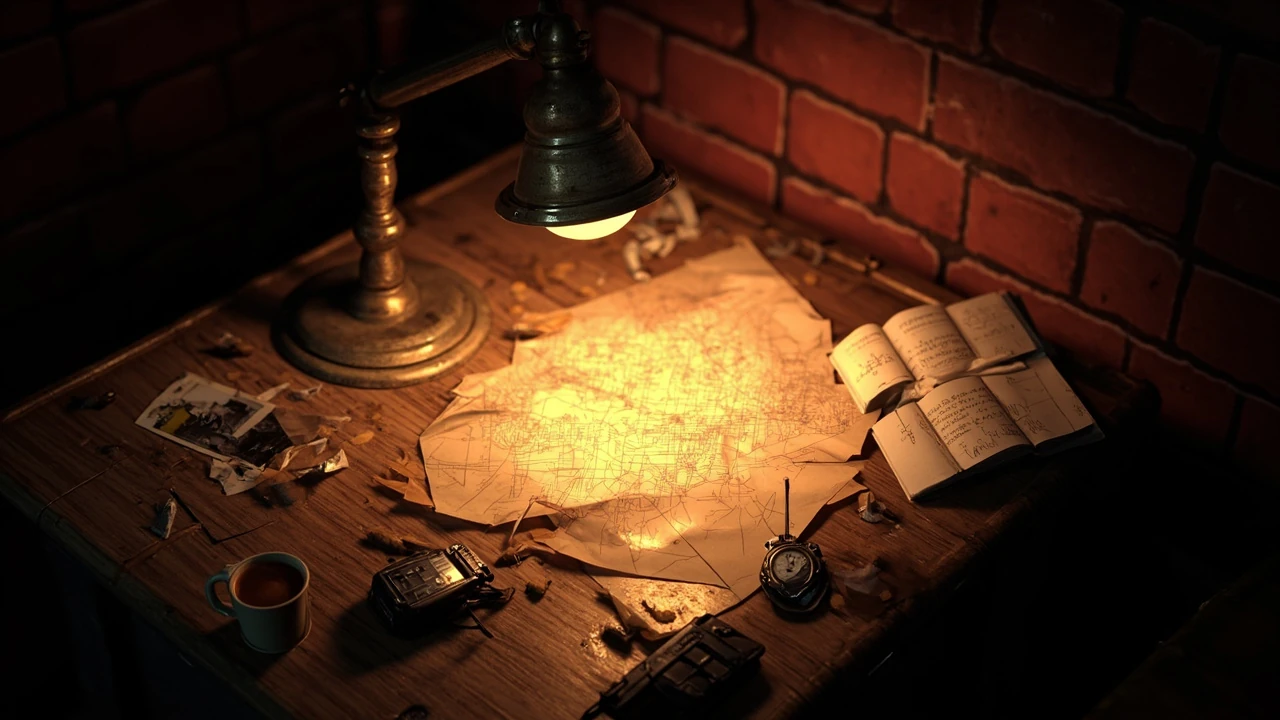
Crime 101: planning, risk, and timing in a heist-driven game
Crime 101 runs on a loop that repeats from the first contract to the last one: scout, plan, execute, and live with what follows. A new crew opens the game, takes a few jobs, and quickly learns that running a robbery has more to do with the minutes spent before the alarm than with reflexes during it. The first three jobs usually teach the lesson the hard way. Crews that survive long enough start treating each job as a small project, with a route, a backup, and a clock that keeps moving. This guide walks through the planning mindset, the risk baked into common choices, the timing that decides a clean getaway, and the habits that turn a rookie crew into a reliable one.
The advice below is written for the moment a player stands in front of the planning board and wonders whether the route drawn on the map will actually hold when the alarm trips. It can be read from start to finish, or jumped into at the section that matches the problem on screen.
What kind of game Crime 101 actually is
Crime 101 is a heist-driven action game with heavy emphasis on preparation, crew management, and the decisions made before stepping through the door. Combat, stealth, and driving all show up, but none of them carries the game on its own. The plan carries the game, because the plan is the only thing that survives contact with a live crew, a moving police response, and a getaway route that may or may not be clear when the alarm hits.
Several design choices shape how the game plays:
- Jobs are short to medium-length missions, usually wrapped around a single primary objective and a short tail of complications.
- The planning board sits between missions and is where most of the strategic depth lives.
- Crew members bring roles, not just skills, so swapping a hacker for a driver changes the shape of the run.
- Failure has a real cost. A failed job spends resources, raises heat, and changes which contracts are available next.
- Progression is tied to reputation and crew trust, not to a single linear power curve.
That structure is why the game rewards a project-management mindset more than twitch aim. A campaign can be finished on raw reaction time, but the money, crew, or patience runs out long before the credits. Crews that plan a job as a small project, with a clear owner for each step and a fallback for each risk, are the ones that reach the late game in a healthy state.
The planning loop: how a job actually comes together
Every job in Crime 101 follows the same five-stage loop. The stages look obvious on paper, but each one has a failure mode that catches new crews. Treat the loop as a checklist rather than a suggestion, and consistency will improve faster than any individual skill upgrade.
1. Reconnaissance and target reading
Recon is the cheapest part of a job and the easiest to skip. The map screen exposes the building, the surrounding streets, the camera layout, and a few telling details: a service entrance on the south side, a vent on the roof, a guard rotation that takes forty seconds. Spend a full in-game day walking the perimeter with the planning tools before committing to a route. A large share of failed runs come from crews who only saw the building from the approach the mission designer expected them to use.
2. Crew selection and role assignment
Crew selection is where the job becomes a specific plan. A two-person crew with a driver and a hacker plays a very different run from a four-person crew with a safecracker, a lookout, a muscle, and a second driver. Roles determine which tools are usable, which entry points are realistic, and how the crew splits up once inside. The trap is over-staffing a small job. Extra crew mean extra cuts and a louder exit. Match the crew to the route, not the other way around.
3. Route, entry, and exit
Decide the entry and the exit before anything else. A clean exit is worth more than a clever entry, because the exit is what the crew will be doing when the clock is against them. A useful rule: if the exit cannot be drawn on the map in under thirty seconds, the route is too clever. A clean exit has a vehicle already placed, a fallback vehicle, and a route that does not cross a major chokepoint during business hours.
4. Equipment loadout and consumables
Equipment is the part of the plan easiest to over-buy. Bring only what the route needs and one contingency. If the entry is a social disguise, heavy breaching tools are dead weight. If the entry is a back window, the social disguise is dead weight. Consumables, especially the limited ones, should be reserved for the moment the plan has already failed, not the moment the plan starts.
5. Run, adapt, and debrief
When the job starts, the plan is a script, not a cage. The first signal that the plan is wrong should be a pause, not a panic. A short pause, a quick map check, and a fallback to the next stage of the plan will save more runs than any reflex play. After the job, write down what broke. Those notes feed the next recon pass and decide what changes for the next attempt.
Reading heat and the police response
Heat is the single most important number on the planning board after the route. It decides how aggressive the police will be, how fast response units arrive, and how long the city stays in high alert after a job. New crews tend to ignore heat because it is invisible until it is not. A high-heat run on a low-heat plan is the most common way a clean job turns into a full city lockdown.
The practical reading of heat looks like this:
- Low heat: a single patrol wave, short pursuit, and a normal cooldown. The job plays close to the planning notes.
- Medium heat: response units arrive faster, roadblocks are placed on main roads, and chokepoints become unreliable.
- High heat: helicopters, armored units, and a pursuit that does not let go near the planned exit. High-heat runs demand a different exit, not a louder gun.
The mistake is treating heat as a single number. Heat is the product of crew visibility, the job’s profile, and the time of day. A quiet jewelry job at night is not the same as the same job at noon. If the heat readout jumps between planning and execution, switch to the backup plan before crossing the threshold.
Timing windows: when to start and when to leave
Crime 101 is a clock game. Every location has rhythm: a guard rotation, a delivery window, a shift change, a quiet hour. The crew that picks the right window can walk through a building that the same crew would have to fight through an hour later. Timing is the cheapest advantage in the game, because it is paid for with patience, not with cash.
Patrol and guard cycles
Most buildings have a guard cycle of between ninety seconds and three minutes. The cycle is regular at the start of a shift and gets irregular after a small incident, so always observe at least two full cycles before committing. The gap to look for is the one where the entry and the room that needs to be reached are both unobserved for at least ten seconds. Anything shorter than that is a guess.
Shift changes
Shift change is the cleanest window in most buildings. Staff move from one post to another, the camera operator is on a handoff, and the building’s internal radio carries extra traffic. A short, quiet job during a shift change is the closest the game gets to a free pass. The risk is that the window closes fast, so the route during a shift change has to be rehearsed, not improvised.
Time of day
Time of day changes the entire job, not just the lighting. A daytime job has more civilian traffic, more police visibility, and a faster response time. A nighttime job has fewer witnesses but tighter guard presence and a longer response time. The choice between day and night is a tradeoff between two different risk profiles, and the right answer depends on the route drawn on the map.
Roles, tools, and how to staff a crew
Crew roles are not just a stat block. Each role is a set of permissions during the run. A driver is allowed to use the getaway vehicle, a hacker is allowed to use the network tools, a lookout is allowed to call a soft abort, and a muscle is allowed to use the loud tools without breaking crew trust. Choosing the wrong role for a route is a quiet form of failure: the plan works on paper, but the on-screen prompt refuses to fire because the right role is not on the crew.
A useful crew composition for most mid-game jobs looks like this:
- One entry specialist who handles the first door and the route to the objective.
- One technician who handles cameras, safes, or network access.
- One lookout who watches the patrol cycle and has permission to call an abort.
- One driver who is in the vehicle, engine running, before the alarm is pulled.
Early in the game a two-person crew with an entry specialist and a driver is enough. Late in the game, swapping a muscle for a second technician often wins more jobs than any single piece of gear. Crew management is a project-management problem dressed up as a role-playing system.
Gear, loadouts, and the cost of carrying too much
Gear in Crime 101 is expensive in cash, in inventory slots, and in time. The fastest way to drain a budget is to bring everything to every job. A lean loadout has a clear primary tool, a backup, and one consumable for a known failure mode. Anything beyond that is decoration.
A few rules keep loadouts honest:
- Buy for the route, not for the dream. If the route does not use a breaching charge, the charge is dead weight.
- Keep one panic tool per crew member. A panic tool is the thing to reach for when the plan has already broken.
- Rotate consumables between jobs. A stack of three smoke grenades used across three jobs is more valuable than a stack of ten used across one.
Late-game crews often run a small armor loadout and rely on the route, because a clean plan avoids the hits that armor exists to absorb. The shift from a gear-heavy crew to a route-heavy crew is the moment the game stops feeling like a shooter and starts feeling like a planning sim.
Money, reputation, and when to spend
Crime 101 runs on two currencies that matter: cash, which is short-term, and reputation, which is long-term. Cash pays for the next job. Reputation opens the next tier of jobs, the better crew, and the safer routes. The trap is to spend reputation on cash-equivalent upgrades, because the credit recovery on reputation is slow and the next tier of jobs is where the real money lives. The same split shows up across the wider heist genre, where Crime 101 is often cited as a modern example of a story that rewards preparation over impulse, and patience at the planning stage pays off when the alarm finally trips.
A simple way to think about the two is to picture them as project budgets.
Cash budget decisions
Cash decisions are short-term: pay the crew, buy the gear, cover the bail after a bad job. The guideline is to keep at least one job’s worth of cash in reserve, because a failed job usually has a cleanup cost. If the cash reserve drops below that line, the next job is a financial risk even if the plan is perfect.
Reputation budget decisions
Reputation decisions are long-term: invest in a crew member, unlock a safehouse, or pay for a contact who opens new contracts. These decisions are slow to pay back and should be made on a calendar, not in the heat of a planning board. A reputation move made because a job went bad is usually the wrong move.
Failure modes: how a job goes wrong and how to recover
Most failed jobs fall into a small set of patterns. Once the patterns are visible, recovery becomes a checklist. A crew that knows its own failure modes is a crew that loses a job but keeps the campaign.
- Wrong entry point: the entry works, but the route inside does not. The recovery is a retreat to the last safe room and a re-route from there, not a full restart.
- Wrong time window: the patrol cycle shifted. The recovery is to wait one full cycle in cover, then continue. A premature push is the most common cause of a chain failure.
- Wrong exit: the planned exit is blocked. The recovery is the secondary exit, which should already be on the map before the job starts.
- Wrong gear: the right tool is not on the crew. The recovery is to abort and try again with the right loadout, because improvising with the wrong tool usually costs more than the abort.
- Wrong heat: the heat readout was higher than expected. The recovery is to switch to a quieter objective, take the partial payout, and reset heat before the next attempt.
A useful habit is to keep a small post-mortem after every failed job. Two lines are enough: what broke, and what the next plan changes. The post-mortem is the cheapest piece of project management in the game, and it is the single biggest differentiator between a crew that improves and a crew that keeps repeating the same crash.
Driving the getaway: the part crews under-train
Driving is the part of the game crews practice least, because it is the part that happens after the plan. The getaway is also the part of the job where small mistakes become large ones, because the clock is already against the crew and the police response is already on the road. A clean getaway needs three things in place before the alarm is pulled: a vehicle, a route, and a driver who has actually driven the route.
A few habits help:
- Park the vehicle in the same place for every job in a district. The muscle memory of a known exit is faster than a memorized route.
- Practice the route at low heat before using it on a real job. The route that looks clear on the map may have a low bridge, a one-way street, or a police spawn point that was missed.
- Keep a second vehicle on a parallel street. The primary vehicle is the plan, the secondary vehicle is the recovery, and the recovery is the one that saves a campaign.
Stealth, combat, and when to switch
Stealth and combat are not opposites. They are phases. A clean run is mostly stealth, with a short combat phase when stealth breaks and a quick return to stealth once the threat is gone. The trap is to commit to one or the other for the whole job. A crew that commits to combat for the whole run will run out of ammo, raise heat, and end the campaign early. A crew that commits to stealth for the whole run will be unable to recover from a single detection.
The decision to switch is a project-management decision dressed up as a reflex. The signal to switch is usually a change in the map state: a guard moved, a camera turned, a civilian ran, a radio call started. The signal is not the gunfight itself. By the time the gunfight starts, the decision to switch has already been delayed.
Safehouses, planning boards, and the campaign layer
The campaign layer is what sits between jobs. Safehouses store gear, planning boards store routes, and contacts open new contracts. Most of the campaign’s strategic depth lives in this layer, and most new players skip it because it looks like a menu. It is not a menu. It is the project-management layer that decides which jobs are realistic in the next ten in-game days.
A useful campaign rhythm looks like this:
- Two or three jobs at low heat to build cash and reputation.
- One mid-tier job that pays the cost of a safehouse or a contact upgrade.
- One high-tier job with a fully rehearsed route and a clean exit.
- A short cooldown period to reset heat and rotate crew members.
That rhythm is slower than a sprint, but it survives the mid-game plateau where most campaigns stall.
Common mistakes and how to avoid them
New crews tend to make the same handful of mistakes. Listing them in the abstract does not help, so each entry below names the mistake, the signal that it is happening, and the smallest change that fixes it.
- Planning only the entry: the signal is a job that goes well until the alarm and then falls apart. The fix is to draw the exit first and the entry second.
- Over-staffing: the signal is a job where half the crew is standing in a hallway. The fix is a smaller crew with a clear role for each member.
- Under-practicing the getaway: the signal is a clean job that ends in a crash. The fix is one low-heat practice run per district before the real job.
- Chasing heat: the signal is a string of high-heat jobs with thin payouts. The fix is a cooldown job that resets heat at a low cost.
- Spending reputation on cash: the signal is a faster tier of jobs that never opens. The fix is a calendar of reputation moves that ignores in-the-moment pressure.
Comparing crew playstyles at a glance
The table below compares three crew playstyles that show up in most campaigns. The numbers describe a typical mid-game crew and are useful as a planning aid rather than as hard stats.
| Playstyle | Crew size | Entry style | Heat tolerance | Best job profile | Main risk |
|---|---|---|---|---|---|
| Quiet crew | 2 to 3 | Social or technical entry, no loud tools | Low to medium | Small jobs with a single objective | No panic tool if the plan breaks |
| Balanced crew | 3 to 4 | Technical entry, one loud backup | Medium | Mid-tier jobs with two objectives | Coordination cost between roles |
| Loud crew | 4 to 5 | Loud entry with armor and suppression | High | High-tier jobs with a fortified target | Heat and crew cost on every job |
Comparing timing windows in the same district
One of the most useful pieces of planning is to compare timing windows in the same district. The table below shows how a typical mid-game target reads at different times of day, and which kind of crew each window favors.
| Window | Patrol density | Police response time | Civilian traffic | Best crew playstyle |
|---|---|---|---|---|
| Early morning (04:00 to 06:00) | Low, regular cycles | Slow | Very low | Quiet crew |
| Late morning (10:00 to 12:00) | Medium, irregular around deliveries | Medium | Medium | Balanced crew |
| Afternoon (14:00 to 16:00) | High, shift change at 15:00 | Fast | High | Balanced crew with a quiet entry |
| Evening (19:00 to 21:00) | Medium, irregular | Fast | High near main roads | Loud crew, or quiet crew with a service exit |
| Late night (23:00 to 02:00) | Low, irregular near service areas | Medium to slow | Low | Quiet crew with a long route |
A short pre-job checklist
Before starting a job, run through this list. It is short on purpose. A long pre-job checklist is a checklist that nobody reads.
- Is the exit drawn on the map, with a vehicle and a backup vehicle?
- Is the crew size right for the route, with no one standing in a hallway?
- Is the loadout lean, with one panic tool per crew member?
- Is the heat readout consistent with the job’s profile and the time of day?
- Has the crew practiced the getaway route at low heat at least once?
If any answer is no, the job is not ready. A job that is not ready is a job that will end in a post-mortem.
How the campaign actually progresses
Crime 101’s campaign moves in waves. Each wave is a small set of jobs that share a district, a contact, or a crew member. The first wave teaches the loop. The second wave tests the loop under heat. The third wave rewards the loop with a reputation unlock. A crew that treats each wave as a project with a clear owner and a clear end is a crew that reaches the late game in a healthy state.
A useful way to frame each wave is to answer three questions before it starts:
- What is the cash target for the end of the wave?
- What is the reputation target for the end of the wave?
- What is the one piece of gear or crew the wave is meant to unlock?
If those three questions have answers, the wave is a project. If not, the wave is a sprint, and a sprint in Crime 101 usually ends in a cash crunch.
Why planning is the most powerful tool in the game
The most powerful tool in Crime 101 is not a weapon, a vehicle, or a hack. It is the planning board, because the planning board is the only place in the game where the crew has all the time it needs and all the information it has. The on-screen moment is full of noise, but the planning moment is full of signal. Crews that protect the planning moment and use it well are crews that reach the late game. Crews that skip the planning moment and improvise on the clock are crews that run out of money, crew, or patience before the credits.
That is the underlying logic of the game, and it is the same logic that runs through a long lineage of heist stories in film and games. The fun is the plan, and the run is the moment the plan is tested.
Frequently asked questions
What is the best crew size for a new player in Crime 101?
A two-person crew with an entry specialist and a driver is the best starting size. It is enough to handle a small job cleanly, and it keeps the planning board readable. A new player should add crew only when the route demands a specific role, not when the budget allows a fourth body.
How do I keep heat from getting out of control?
Treat heat as a planning variable, not a number to react to. Pick jobs that match the current heat readout, leave a cooldown job between high-heat jobs, and avoid running two loud jobs back to back in the same district. If the heat readout jumps between planning and execution, switch to the backup plan before crossing the threshold.
When should I spend reputation instead of cash?
Spend reputation on long-term unlocks, not on short-term recovery. A safehouse, a contact, or a crew member is a reputation move. Bail, cleanup, or a one-time gear purchase is a cash move. Mixing the two is what stalls a campaign in the mid-game.
What is the single most important habit to build early?
Draw the exit before the entry. Most failed jobs fail at the exit, not at the entry. A clean exit is worth more than a clever entry, and the habit of drawing the exit first will save more campaigns than any single gear upgrade.
Should I play loud or stealth for most of the campaign?
Play stealth as the default and combat as the recovery. A campaign that defaults to combat runs out of ammo, raises heat, and ends early. A campaign that defaults to stealth has no recovery when the plan breaks. The right balance is a quiet plan with one loud backup per crew member.
How do I know if a job is too hard for my current crew?
Look at three signals: the heat readout, the recommended crew size, and the recommended gear. If any of the three is more than one tier above the current crew, the job is a stretch. A stretch job is fine as a planning exercise, but the payout should be balanced against the cost of a failed attempt.
What is the fastest way to recover from a failed job?
Take a low-heat cooldown job in a different district, rotate the crew, and write a two-line post-mortem. The post-mortem is the cheapest project-management tool in the game, and the cooldown job is the fastest way to reset heat without spending cash.
Do safehouses and contacts really matter in the mid-game?
Yes. Safehouses store gear and shorten the route between jobs. Contacts open new contracts and shift the heat curve. A crew that ignores the campaign layer is a crew that runs out of options in the mid-game, because the only available jobs are the same ones that the crew has already failed.
How should I use the planning board when I am short on time?
Limit the planning pass to ten minutes and three decisions: the exit, the crew, and the loadout. If any of the three is not decided inside the time, the job is not ready. A short, honest planning pass is more reliable than a long planning pass that covers every variable.
Is Crime 101 better played solo or with a coordinated crew?
Both work, and the game is built to support both. Solo play rewards the planning mindset because the planning board is the only place where the crew has all the time it needs. Crew play rewards role clarity because each role is a permission set during the run. The right answer depends on which resource is more scarce in the group: time or coordination.
Leave a Reply