
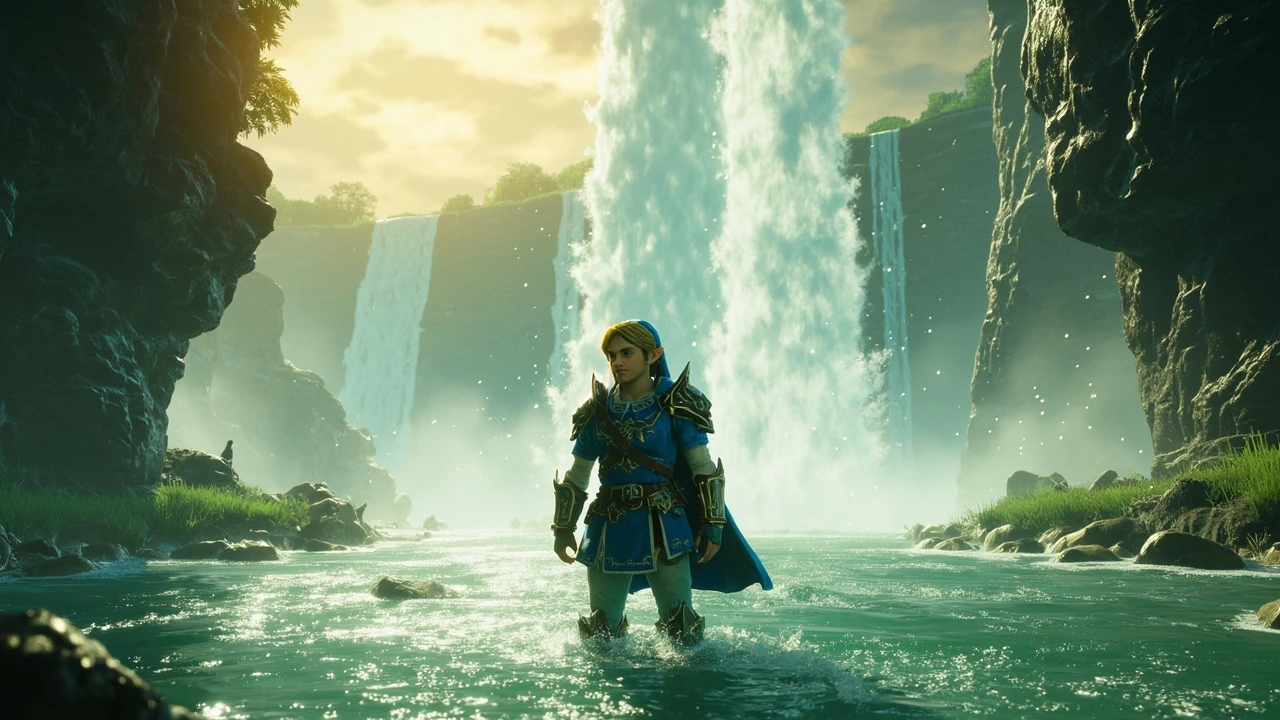
Zora armor TotK: how to get it, upgrade it, and use it well
The Zora armor set is the first armor that changes how swimming actually feels in Tears of the Kingdom. Most head, body, and leg pieces give small stat bonuses and nothing else. The Zora set gives Link a stamina-free swim dash, unlocks a vertical water-spout jump, and turns rain from a climbing hazard into a launch pad. A player who plans to explore the Lanayru region, climb the cliffs around Zora’s Domain, or chase the Sludge Like Like line in the Depths gets the value out of the set within the first hour of use. This guide covers where every chest is hidden, what each upgrade tier changes under the hood, and how the swim-dash and spout interact with combat, weather, and the durability system that the rest of the armor roster shares.
The guide sticks to a single normal playthrough on the base game. It does not cover Amiibo unlocks, modded behavior, or speedrun routing. Where a detail is sensitive to patch or version, the version is named so a player on an older build can still follow the path described.
What the Zora armor actually does
The Zora armor is a three-piece regional set with a set bonus, following the same structural pattern as the Climbing, Flamebreaker, and Snowquill sets. Two pieces grant a passive benefit, and the full three-piece set adds a unique active ability that the player can trigger without consuming a key item, a Zonai battery, or a shrine reward.
The set pieces are:
- Zora Helm — head piece, the most ornate of the three.
- Zora Armor — body piece, with the blue-tinted chest plate and the fin-shaped pauldrons that read as Zora from a distance.
- Zora Greaves — leg piece.
What the set actually changes in player capability, in plain terms:
- Swim dash: With at least two pieces worn, pressing the dash button on the surface of a body of water launches Link forward as a low splash burst that travels further than a ground dash and does not drain the stamina wheel while submerged. The dash ends the moment it hits land or runs out of momentum.
- Water spout: With all three pieces equipped, swimming up next to a waterfall or standing under falling rain on flat water produces a vertical spout under Link. Pressing jump at the right moment launches him upward, and the game treats that apex as a valid paraglider launch height. The spout is the standard way to enter Zora’s Domain from the river below without spending a wheel of stamina.
- Swim speed bonus: Two or three pieces raise Link’s base swim speed noticeably, which compounds with the swim dash on long river routes.
- Wet-state climbing protection: The set’s surface lets Link ignore the slip penalty that rain normally applies to rock climbing. Other climbing rules still apply, including the stamina cost per handhold, but the slip itself goes away.
None of these effects are gated behind an Amiibo scan, a DLC purchase, or a side quest. The set is base-game content. Every Zora piece can be found on the surface map without starting any quest, although some quest steps point players to the same chests as a convenience.
Where to find each Zora armor piece
Each piece of the Zora armor is hidden in a chest on the surface. None are inside shrines, none are in the Depths, and none require a story flag to reach. The chests are designed to be discoverable, but the routes into them reward the kind of exploration the rest of Tears of the Kingdom also asks for. The table below lists the canonical locations, the nearby landmark to navigate toward, and a short note on what to expect when the player arrives.
| Piece | Region | Landmark to navigate to | Chest location detail |
|---|---|---|---|
| Zora Helm | Lanayru Great Spring | Zora’s Domain, on the landing above the throne room | Inside a stone structure accessed by paragliding from the top of the structure behind the throne. The chest sits in a small pool room behind a low wall. |
| Zora Armor | Lanayru Wetlands | Mipha Court, on the plateau above the wetland | Inside a stone arch structure at the top of the staircase that rises out of the water. Paraglide from the court’s plateau to reach the chest room on the central pillar. |
| Zora Greaves | Upland Zorana | Upland Zorana Skyview Tower, north of the wetland | Inside an open stone structure in the shallow pool beneath the tower. The chest sits in the back of the pool against the wall and is only openable by diving. |
Two missed-chest patterns show up over and over in this region, and they are the same patterns the game uses elsewhere on the map. The first is a chest that is only visible from a height the player cannot reach without the set itself. The second is a chest that sits in plain sight underwater, with the gold glow visible from the surface but the lid only reachable by diving. The Zora Armor chest is the first kind: the chest is on a pillar the player cannot reach without the spout. The Zora Greaves chest is the second kind: it sits in about a meter of clear water and the player has to duck under to open it. Both patterns are deliberate, and both reward a player who has already started to use the set in motion before finishing the collection.
Order of collection that avoids backtracking
The Lanayru region is laid out so that the player can collect all three pieces in a single loop if they approach from the right direction. The order is not sacred, but a practical route looks like this:
- Fast travel to the Upland Zorana Skyview Tower and dive from the launch point to the ground. The Zora Greaves chest sits in the pool beneath the tower’s base; it is the easiest of the three to grab first.
- Swim or glide down to Mipha Court on the wetland plateau. Climb the central pillar stairs, then paraglide across the gap to the chest room and grab the Zora Armor.
- With the full set now available, swim to the river below Zora’s Domain, surface near the entry bridge, and trigger the water spout from the river to launch up to the throne-room landing. The Zora Helm chest is in the small pool room behind the throne.
The order matters less than the realization that both the Mipha Court chest and the throne-room chest are not reachable without paraglide height. The set is the elegant answer the game gives to its own routing problem. The game expects the player to have most of the set before finishing the set’s own collection loop, which is why the greaves are the easiest piece to grab first and the helm is the natural last piece.
Upgrade paths and material costs
Each Zora piece can be upgraded at any Great Fairy fountain four times, taking it from one star to four stars. The upgrades are linear, the cost grows at each tier, the defense value rises each tier, the swim-dash and spout behavior does not change with stars, and the visual look of each piece grows more ornate as the tier climbs. Upgrading a piece to four stars also unlocks the small set bonus damage bump against Like Likes, which is the only combat-adjacent effect of the upgrade track.
Zora upgrades use a recurring set of materials. The dominant material is the Lizalfos tail, which is dropped by all three Lizalfos types found on the surface. The secondary material is the Lizalfos horn, dropped by the same enemies and also found in low numbers on the overworld in the Lanayru region. The third material is the Hearty Bass, an item more typically associated with cooking but required as a boss-tier upgrade ingredient for this set. The cost pattern follows the standard Great Fairy schedule: a low-cost first upgrade, then a larger second upgrade, then a third upgrade that requires fish and a final fourth upgrade that asks for the rarest combination of the three.
| Upgrade tier | Defense added (per piece) | Primary material | Approximate total needed across all three pieces |
|---|---|---|---|
| 1 star → 2 stars | +2 | Lizalfos tail | 3 tails |
| 2 stars → 3 stars | +3 | Lizalfos tail and Lizalfos horn | 6 tails, 3 horns |
| 3 stars → 4 stars | +4 | Lizalfos horn and Hearty Bass | 3 horns, 3 Hearty Basses |
The Lizalfos tail is the limiting reagent. A standard Lizalfos drops a tail on defeat, but only on the killing blow and only when the killing blow is not a bomb arrow or a one-shot weapon that destroys the body part. Lizalfos are also the enemies most often in the way during the Zora regional story content, so the player is likely to have a small stockpile by the time the second upgrade is offered. The Hearty Bass is the rarer ingredient. The game does not respawn fish in a stocked pond, so the player should hold the bass until the tier three upgrade is actually available at a fully powered Great Fairy rather than spending the catch on Hearty Bass meals first.
A short checklist before walking into the third-tier upgrade:
- Confirm at least one Great Fairy is unlocked past the second-tier prerequisite, because the tier three and tier four upgrades are only offered at a fully powered fountain.
- Stack three Hearty Basses in a single inventory slot; they are stackable, so the player does not need a slot for each fish.
- Bring a few extra Lizalfos horns in case a horn is consumed by an in-region quest the player has not finished yet, since the in-region “Luminous Stone” delivery quest and the “Sidon of Lanayru” steps both ask for Lizalfos parts.
Swim-dash mechanics in practice
The swim-dash is a stamina-free horizontal burst that travels about the length of a Korok forest clearing on flat water. It does no damage, does not create splash damage, and does not interact with weapon durability. The two practical uses are river crossing and water-based traversal puzzles where the player would otherwise have to chain fan devices or build a raft. For background on the broader Zora lore and the swim-dash’s place in the long-running Zelda series, the Legend of Zelda series overview is a useful reference point.
The mechanics that matter once the player is in the water:
- Stamina is preserved during the dash itself. The player can chain a swim-dash into a water-spout jump into a paraglider into another swim-dash without touching the stamina wheel. The set is effectively a small stamina budget in itself, which is why so many player route notes call it the only set that opens up the river map at low heart counts.
- Dash cancels on land. Touching any solid surface ends the dash immediately. That is useful for tight corridors and unforgiving puzzles where the player does not want to overshoot the target platform.
- Rough water reduces dash range. The swim-dash range is shorter in choppy water or against a strong current. The Lanayru river is gentle; the Tabantha and Hebra rivers are not, and the player should plan around current when chaining dashes there.
- Wind affects dash direction. A cold north wind in the Hebra region can push a swim-dash off course. The player should aim into the wind when starting the dash or use a sail instead, depending on the goal.
The swim-dash is also a small but real combat option. A charged Zora weapon on top of a swim-dash catches enemies that the player was using the river to flank, and a Zora boomerang on a wet enemy deals bonus damage. The dash itself does no damage, but it positions the player where a water-enchanted weapon does, and the wet-state bonus is independent of the armor tier.
Water-spout mechanics and where the spout is reliable
The water spout is the set’s signature move. With all three pieces equipped, the player can trigger a vertical jet of water under Link by swimming next to a waterfall or by standing under falling rain on flat water. The spout acts as a single-use elevator: press jump while the spout is active to launch Link to the apex of the spout’s height, then paraglider down to a target landing. The window to press jump is short but generous, around a full second, and the player can cancel the launch by simply not pressing jump.
The spout has three behaviors worth knowing before the player starts to rely on it:
- Trigger conditions. A spout only forms when the player is in water that is moving vertically. A still pond does not produce a spout, even in heavy rain. A river flowing over a small drop, a waterfall, or rain falling on a flat river does.
- Height. A spout lifts Link roughly the height of a one-tall Zonai device. That is enough to clear a small overhang, not enough to reach a skyview tower launch pad from the ground. The Zora spout is a routing helper, not a vertical skip that breaks the map.
- Paraglider launch. The spout is the only way in the base game to launch the paraglider from a water surface without a Zonai wing or a tower. A player with the set can paraglide from a river to a mid-air Korok platform, which is otherwise an arbitrary traversal puzzle in the base game.
The reliability of the spout in rain is the reason a player with the set does not need to wait for sunny weather to clear a water obstacle. The rain penalty that normally breaks climbing is the same rain that triggers the spout. The set converts weather into terrain, and that is the core reason it feels different from the Flamebreaker or Snowquill sets, which only negate weather damage without giving the player anything back.
Combat, durability, and the Zora weapon line
Each Zora piece is independent of the Zora weapon line. The set does not buff Zora-made weapons and the weapons do not buff the set. The set’s combat value is in mobility rather than raw damage output. That said, the player usually picks up the Zora Spear, Zora Sword, and the Silver and Golden variants while exploring the region, because the same Lizalfos and Like Likes that drop the upgrade materials also drop the weapons. A Zora weapon plus a wet enemy plus a charged hit is the highest sustained melee damage a low-heart player can put out in the early game.
Durability is the only mechanical coupling. Every Zora piece has the standard armor durability rule that all regional sets share: it does not break in the traditional sense, but its defensive value drops when its hidden durability counter runs low. The counter is restored by paying a small amount of rupees at any Rock-Roast vendor or by visiting a fairy fountain. Players who use the set in rain a lot will deplete the durability counter faster than the visual wear suggests, because the wet-state climbing and the swim-dash both count against the hidden counter on every action.
A durability-aware play pattern looks like this:
- Equip the set only when the player knows they will be in or near water. The set’s passive swim-speed bonus is wasted on a player who is climbing a skyview tower.
- Switch to a regular climbing or heat set when leaving the river, to preserve the set’s hidden counter for the next swim.
- Visit a fairy fountain before any major Zora-region encounter rather than after, because the set’s armor rating drops just when the player needs it most.
Synergy with other sets and with weather
Armor in Tears of the Kingdom stacks effects across two worn pieces and a single active set bonus at a time, which means the Zora set is one of two sets the player usually wears. The other slot is a context-specific piece chosen for the route. A few useful combinations:
| Other piece in the second slot | Reason to combine | Watch out for |
|---|---|---|
| Snowquill Headdress or Snowquill Boots | Adds a passive cold-resistance bonus for cold rivers in the Hebra region while keeping the swim-dash and the spout. | The cold bonus is a single set bonus, not a stack. The player gets the Snowquill bonus or the Zora bonus, not both. |
| Climbing Gear (any piece) | Adds a climbing-speed bonus that the Zora set does not provide, useful for waterfall cliff faces. | |
| Radiant Shirt (a depth-set piece) | Adds a stealth bonus in caves that connect to the river, useful for the Sludge Like Like depth runs in the eastern Depths. | Stealth is rarely relevant in open water; only useful in adjacent cave mouths. |
The set does not interact with weather damage, only with the climbing-slip penalty. A player caught in a thunderstorm should still unequip metal weapons, and a player in the Gerudo desert should not rely on the set at all. The set is a water specialist, and the rest of the armor roster is there to cover the situations where the Zora set is the wrong tool.
Common mistakes when collecting or upgrading
A handful of predictable failures show up across player reports and across normal playthroughs. None of these are bugs; they are expectations that do not quite match the set’s design.
- Looking for the helm inside Zora’s Domain itself. The chest is on a ledge that faces the throne-room landing, not inside the throne room. The player who runs through the main hall and out the back misses the chest because the paraglide entry is from above the building, not inside it.
- Trying to reach Mipha Court from the water. The stairs up the central pillar are part of a Vah Ruta-era ruin, and the player cannot climb the lower section without the spout. The intended entry is the south plateau and a paraglide across, which is why the chest is listed as a paraglide entry rather than a water entry.
- Skipping Lizalfos tail collection. Lizalfos tails are the most common Zora upgrade material, but the player who kills Lizalfos with bomb arrows typically does not see a tail drop. A regular melee weapon kill guarantees a tail drop, and using a low-damage bow with a single arrow preserves the body part for a tail drop on the killing blow.
- Upgrading the chest piece first. The chest piece has the largest visual jump between tiers and the smallest gameplay delta. The greaves upgrade is the one that matters most for swim speed and should be the player’s first priority if material is tight.
How the Zora armor fits into a Tears of the Kingdom run
The Zora set is the first of the regional armor sets a player is likely to complete in a normal playthrough. The Climber’s Bandana is often the first piece a player stumbles into, but the Zora set is the first full set the player can reasonably finish within a single region sweep. The set also unlocks the first paraglide-from-water route in the game, which is the basic building block of every later river-based puzzle and the reason later regional sets are designed around the assumption that the player already has the spout.
In the broader progression arc, the set is most useful in the middle of the run, after the player has the paraglider and a small Zonai-device roster, and before the player has the Dark and Depths sets. The end-game Depths content uses a different set built around Gloom resistance, and the Sky content uses a different set built around cold resistance. The Zora set is the river-and-rain set that the player uses for roughly the first third of the surface map and then mostly leaves in the wardrobe, which is also why a lot of players undervalue the set on a second playthrough when they already know the routes.
Frequently asked questions
Do I need the full Zora armor set to swim-dash, or do two pieces work?
Two pieces grant the swim-dash and the swim-speed bonus. The water-spout jump is the only effect that requires all three pieces. If a player only has two pieces, the swim-dash is still usable, but the spout does not form on a river or in rain.
Does the Zora armor protect Link from shock damage or cold water?
No. The set’s effects are mobility-focused. Cold-water damage is mitigated by any heat-resistance effect the player stacks in a second slot, and shock damage is mitigated by rubber armor. The Zora set does not interact with either damage type directly, and equipping it near a Lizalfos of the electric variety is still risky.
Can the Zora armor be upgraded past four stars?
No. The Zora set follows the same four-star cap as every other regional armor set in Tears of the Kingdom. The post-game armor line is the Ancient Hero’s Aspect, which is a separate item with its own upgrade path through the Hudson construction side content.
What happens if I wear the Zora set in the Depths?
The set works the same way in the Depths as on the surface, but the Depths has few bodies of standing water, so the swim-dash and spout are rarely useful. The Sludge Like Like runs in the eastern depths are an exception because the player crosses underground rivers there. For most depth content, the Dark or Depth sets are stronger choices because they interact with Gloom damage directly.
Do I lose the Zora set if I dye it at a Dye Shop?
Dyeing only changes the visual color of the piece. The underlying armor identity, the defense value, and the set bonus are preserved. The set is fully recolorable at any Hateno Dye Shop, and the original blue color is recoverable by dyeing the piece again with the default recipe.
Is the Zora set better than the Climbing set for rivers?
For pure river crossing, yes. The swim-dash is a stamina-free horizontal burst that the Climbing set cannot replicate. For mixed river and cliff content, the Climbing set is still better because its climbing-speed bonus applies in air as well as on rock. The honest answer depends on which obstacle the player faces more often on the route they are planning.
Does the Zora set work in rain without a waterfall?
Yes, but only on flat water. Standing in a pool during rain with all three pieces equipped produces a spout from the rain drops alone, which is useful for clearing the tops of Zonai ruins in the Lanayru region. The spout does not form on a dry stone surface, even in heavy rain, and it does not form under a roofed structure.
What is the best Zora armor upgrade priority for a low-material run?
Upgrade the Zora Greaves first, then the Zora Armor, then the Zora Helm. The greaves affect swim speed the most, the chest piece has the most visual impact but the smallest gameplay delta between tiers, and the helm is a low-priority last upgrade when material is short.
Are the Zora set chests missable on a single playthrough?
No. The chests are in the open world and do not lock after a story beat. A player who skips a chest can return to the location later, even after the regional story is finished and the Slate is fully upgraded. The chests are not inside shrines, do not require any quest flag, and are not removed by the post-game map clear.
Does the Zora armor’s water-spout work with the Rain-Tower Shrine challenge?
Yes. The Rain-Tower Shrine in the Lanayru region asks the player to reach a high platform that is only reachable by paragliding from a vertical lift. The spout is the intended solution, and the shrine’s reward is the small key the player needs to leave the area. The set is the in-game answer to the in-game puzzle, and the shrine’s hint text actually references the Zora set by name.
Leave a Reply